
Managed SMB with Active Directory – Administrator Guide
Contents
- Purpose and safety
- Prerequisites
- 1. Verify cluster and Ceph
- 2. Verify the drive
- 3. Configure the IP Group
- 4. Join Active Directory
- 5. Create or verify the share
- 6. Client acceptance
- 7. Controlled failover
- Monitoring
- Troubleshooting
- Rollback
Purpose and safety
For Linux, storage and Windows administrators providing CephFS through eEKAS-managed SMB with Microsoft Active Directory.
Prerequisites
| Item | Requirement |
|---|---|
| Cluster | Three healthy nodes with quorum |
| Ceph | HEALTH_OK; PGs active+clean |
| Drive | Healthy CephFS drive with capacity |
| Network | Static node addresses and unused VIPs |
| AD | Resolvable realm; reachable DNS/KDC/LDAP/SMB; delegated join account and OU |
| Time | Every node can synchronize with the DC |
| Clients | SMB3 and reachability to every VIP |
Record realm, NetBIOS domain, DC/DNS addresses, OU, IP Group, node order, VIPs, drive, share, capacity and access policy. Never record passwords.
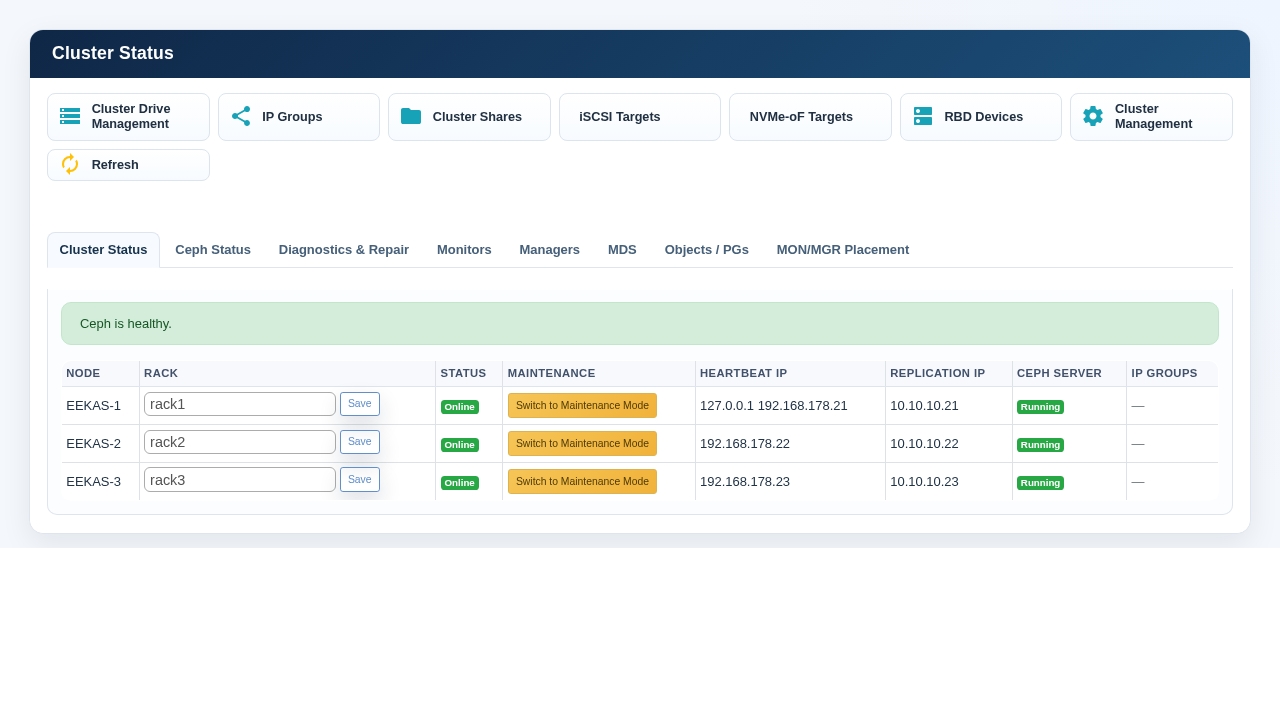
1. Verify cluster and Ceph
- Open Cluster Management → Cluster Status.
- Confirm all nodes Online and Ceph Server Active.
- Confirm Ceph is optimal and all PGs active+clean.
- Do not continue with inactive, peering, undersized or degraded PGs.
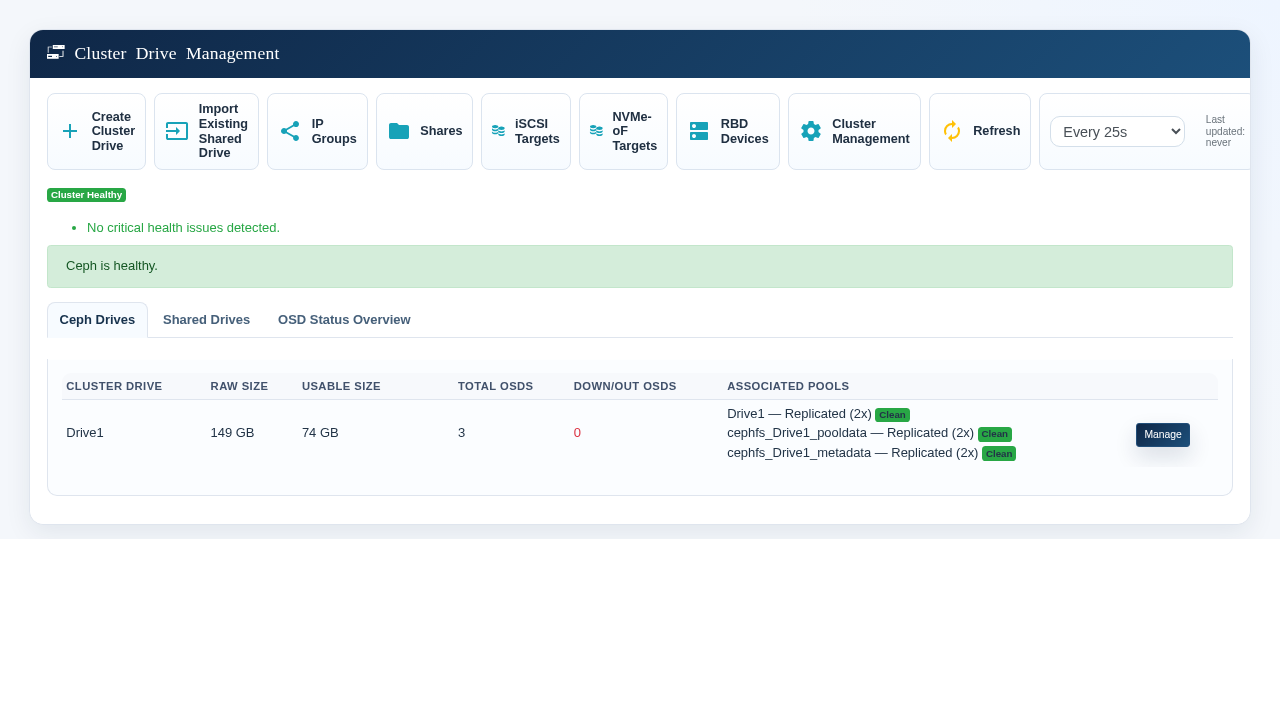
2. Verify the drive
- Open Cluster Drive Management.
- Confirm the drive exists and assigned pools are Clean.
- Confirm zero Down/Out OSDs and adequate usable capacity.
- After creating storage, wait for Ceph health before continuing.
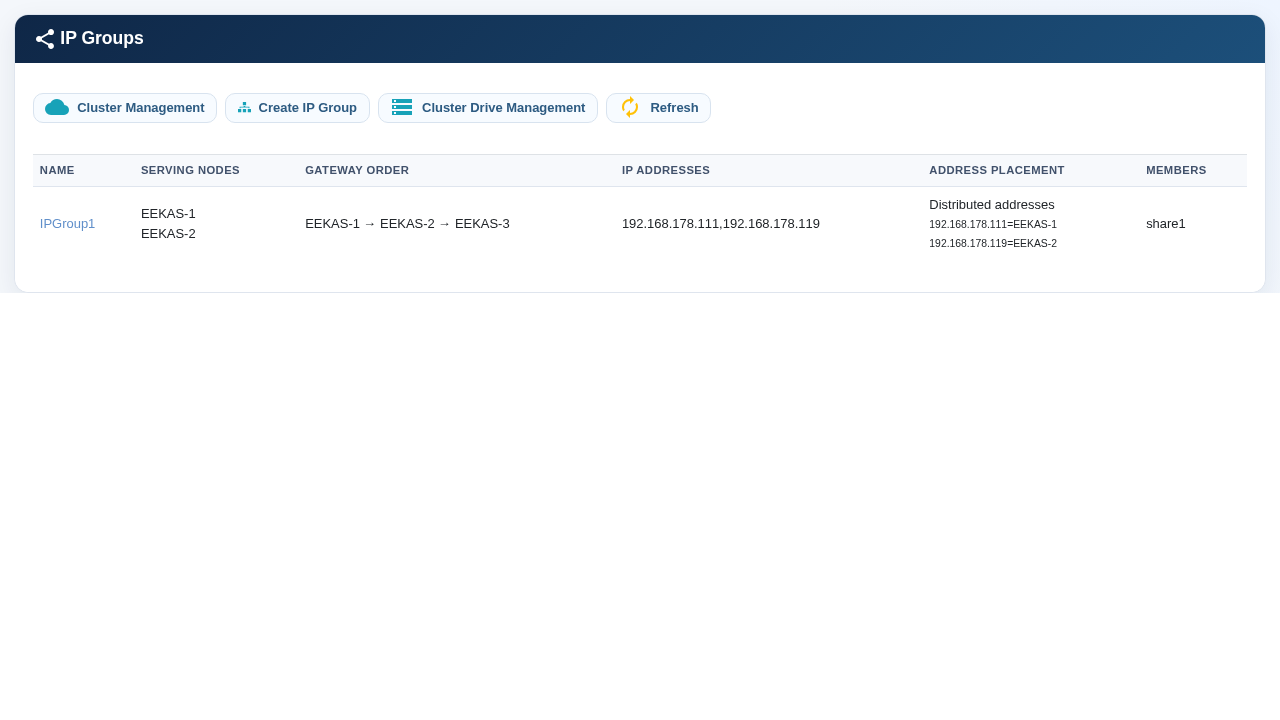
3. Configure the IP Group
- Open Cluster Management → IP Groups.
- Add the eligible gateway nodes and define their preferred order.
- Add one unused client-subnet service address. Add further addresses only when connections should be distributed.
- Use keep-together for a single address or simple active/passive placement; use distributed placement when multiple addresses should run on different nodes.
- Check mask, routing, VLAN and address conflicts.
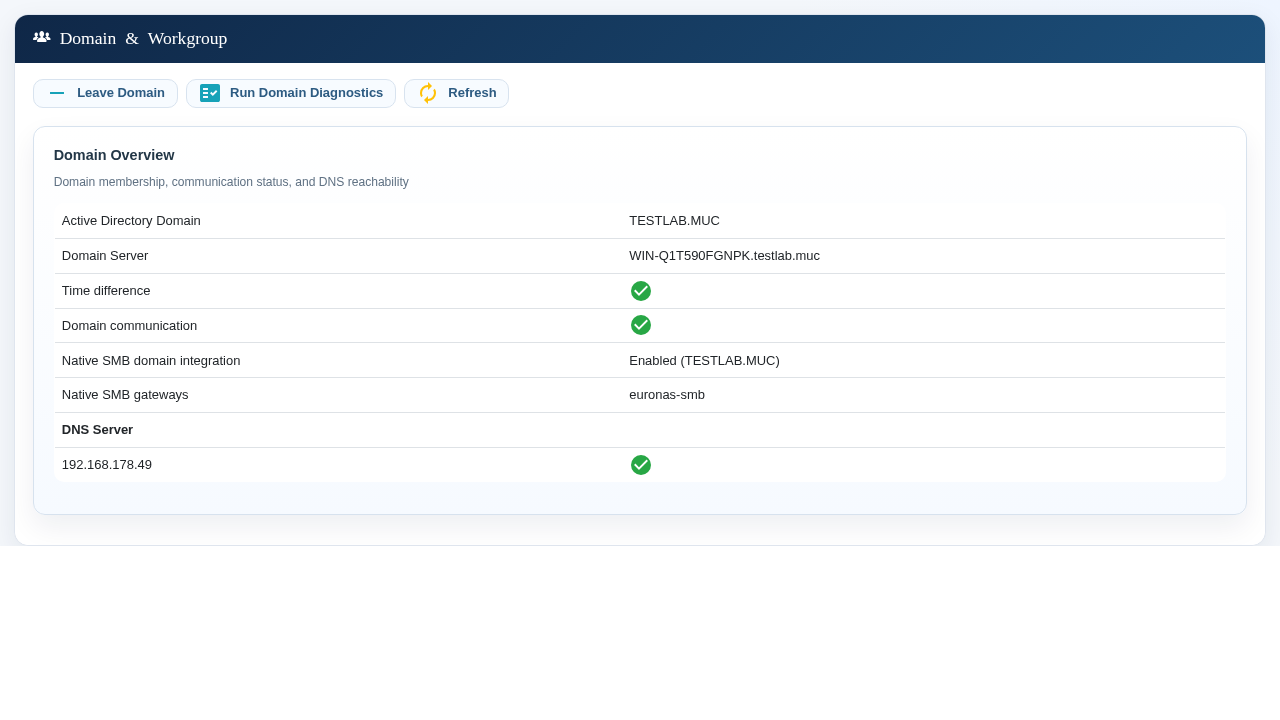
4. Join Active Directory
- Open Domain and Workgroup management.
- Enter the FQDN realm, delegated join user, password, DNS/DC and computer OU.
- Start the cluster join and do not interrupt it.
- The workflow synchronizes peers, joins every node, stores the eEKAS-managed SMB profile and recreates the managed gateways in AD mode.
- Run Domain Diagnostics; require Joined, DNS/Communication Reachable, healthy time and SMB Available on every node.
5. Create or verify the share
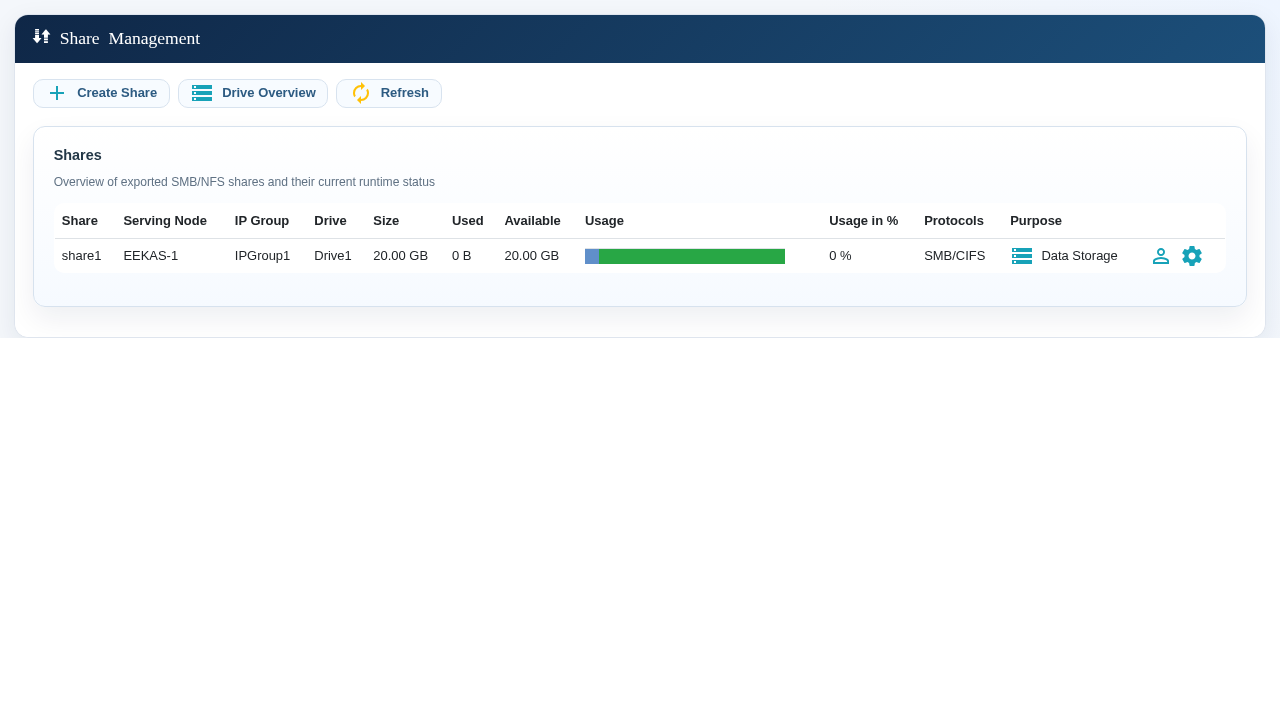
- Open Share Management.
- Select Create Share and the CephFS drive; set unique name and capacity.
- Select SMB/CIFS and the intended IP Group.
- Assign AD users/groups; prefer groups.
- Confirm drive, IP Group, protocol and runtime status.
6. Client acceptance
From an authorized domain workstation, open the service address in the operating system file browser. Confirm that the expected share is visible, create a neutral test file, read it, rename it and delete it. Repeat through every published service address. Test both allowed and denied access.
7. Controlled failover
- Confirm HEALTH_OK, all nodes online, CTDB healthy and a successful pre-test write.
- Record every VIP owner.
- Move one VIP or place its owner in planned maintenance in the GUI.
- Wait until the VIP appears on another eligible node.
- Reconnect to the same VIP and read the pre-test file.
- Create/delete a file through another active VIP.
- End maintenance/clear the move; confirm preferred placement and health.
Acceptance criterion: the same namespace and AD authorization remain available after reconnect. Test application retry behavior separately.
Monitoring
| Check | Healthy result |
|---|---|
| Cluster | All nodes Online; quorum |
| Ceph | HEALTH_OK; PGs active+clean |
| MDS | Active plus standby |
| eEKAS-managed SMB | Expected gateway count running |
| CTDB | Recovery mode NORMAL; all nodes OK |
| AD | Join is OK; diagnostics healthy |
| DNS/time | AD DNS reachable; offset in tolerance |
| IP Group | VIPs on eligible nodes |
| Share | Correct drive/protocol/IP Group/ACL |
Troubleshooting
| Symptom | Likely cause | GUI action |
|---|---|---|
| Share missing | Wrong endpoint/resource/gateway | Check Share Management, Cluster Status and the assigned IP Group |
| Logon fails | DNS/time/trust/ACL | Run Domain Diagnostics; verify realm DNS, time, trust and group |
| VIP reachable; I/O fails | CephFS/MDS/OSD/ACL | Check Ceph Status, Cluster Drive Management, share access and system logs |
| VIP does not move | Node, gateway or network health | Check IP Groups, Cluster Status, maintenance state and alerts |
| Adoption warning | Gateway recreation/CTDB stabilization | Review the detailed GUI message, restore Ceph health and retry |
| PGs peer after time change | Clock inconsistency | Synchronize all nodes to one DC; wait for healthy Cluster Status |
Rollback
If adoption of the eEKAS-managed SMB service fails, preserve Ceph health, review the detailed GUI message and retry the supported workflow. Leaving the domain requires downtime because every node and managed gateway changes.
After rollback verify Ceph, CTDB, VIP placement, share enumeration and read/write access in the GUI and from a client workstation.