Installing Windows - Injecting Paravirtual Drivers
How to Install Windows with Paravirtual Drivers
After creating the virtual machine, you can now start it and begin the installation process. While most Linux distributions include paravirtual drivers by default, Windows requires these drivers to be loaded during the installation. This guide will walk you through the process of injecting the necessary drivers to complete the Windows installation.
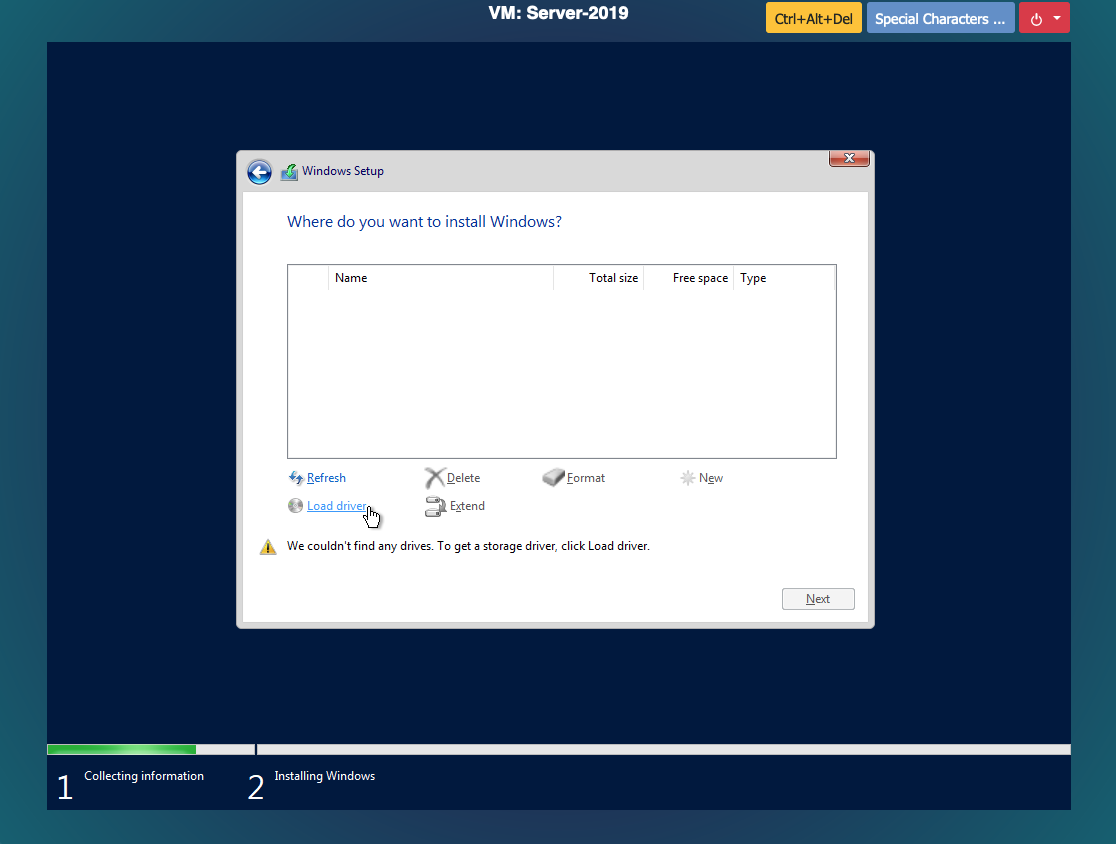
Step 1: Load the Paravirtual Disk Driver
During the installation, Windows may report that no disk has been found because it does not have the required disk drivers. To resolve this, click on Load Driver to manually load the driver.
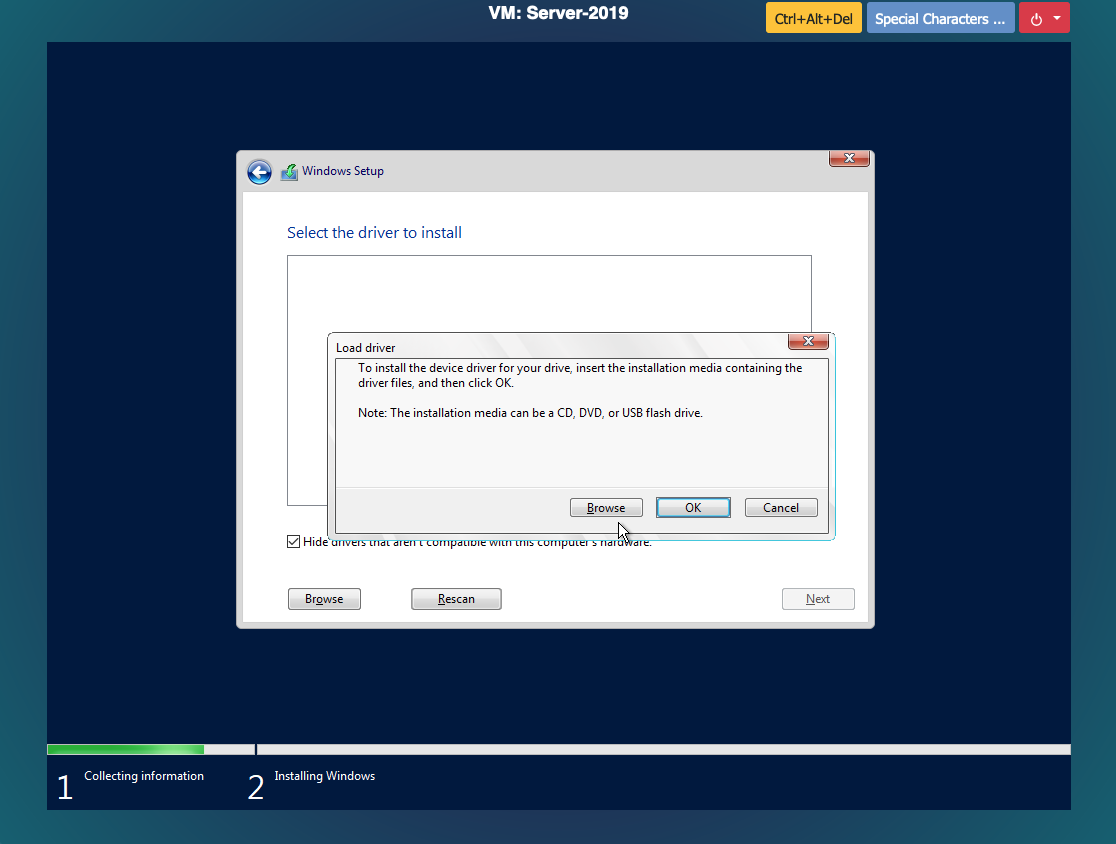
Step 2: Browse for the Driver
Click on Browse to locate the driver.
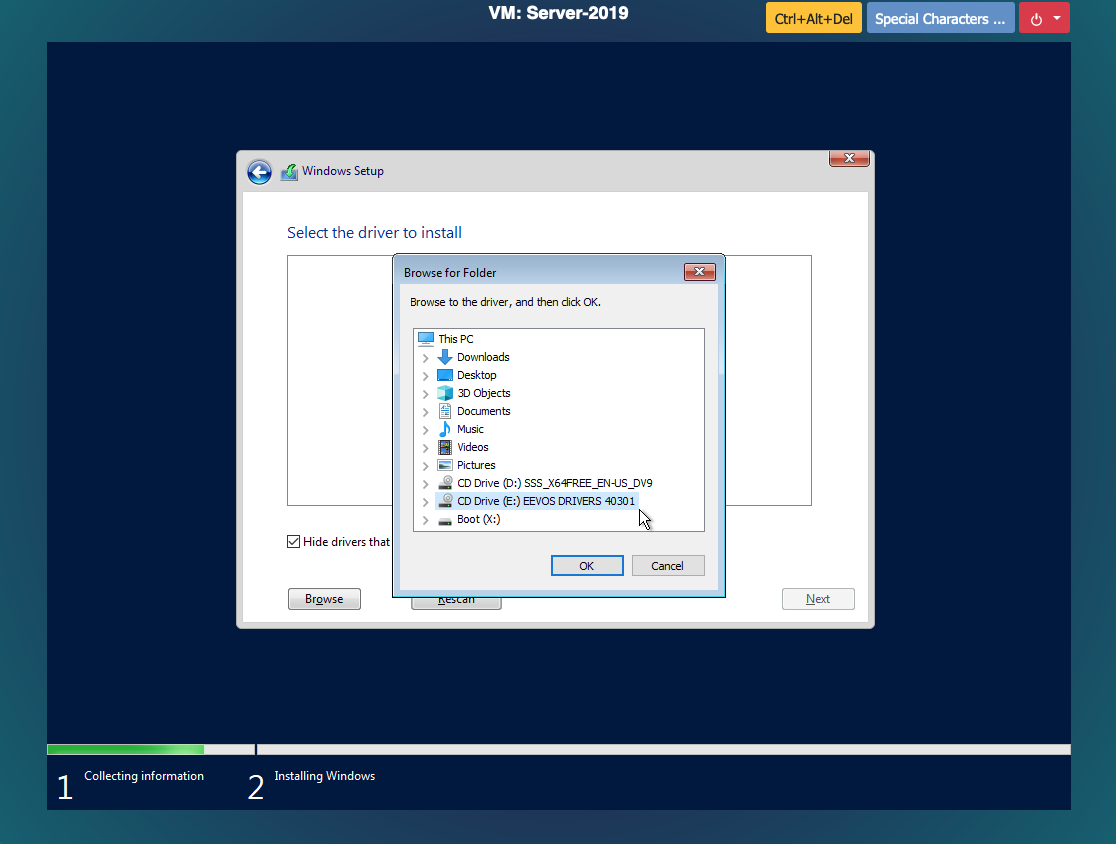
Step 3: Select the Driver CD
Next, select the CD Drive labeled “EEVOS DRIVERS.”
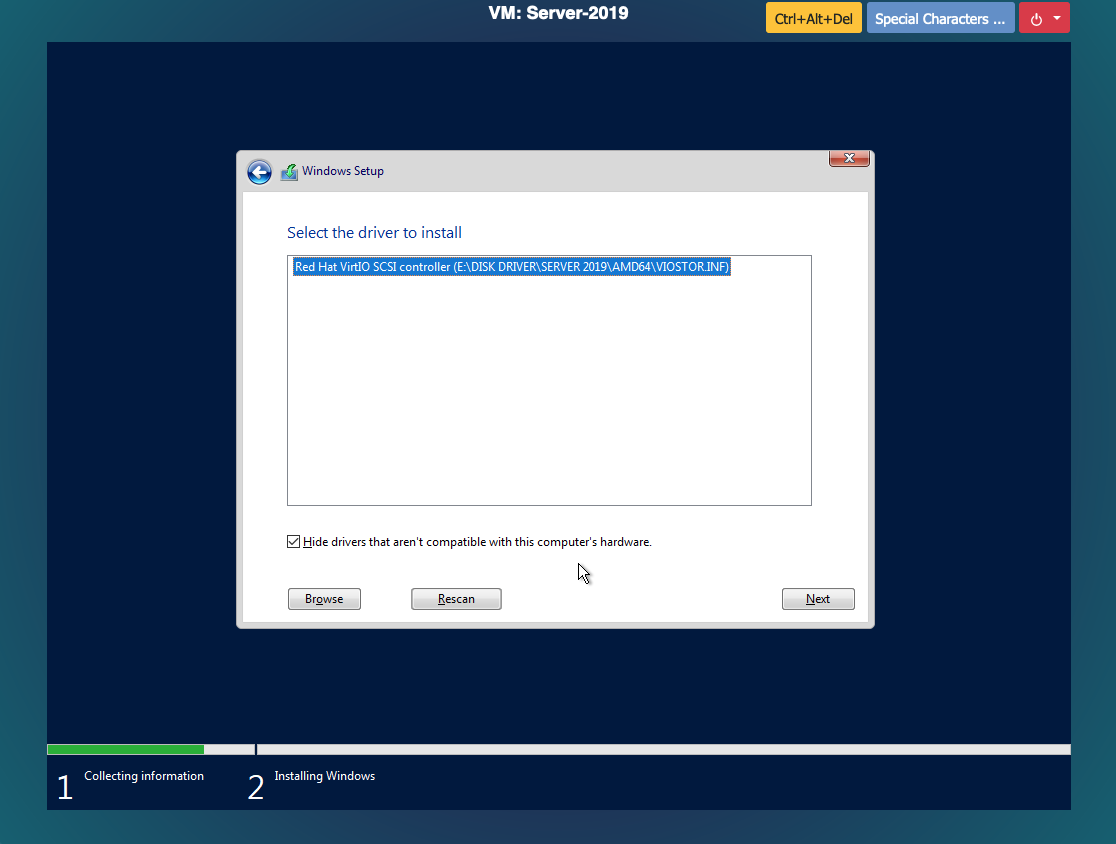
Step 4: Choose the Disk Driver
Select the appropriate Disk Driver for your OS version and click Next.

You should now see the Virtio SCSI Controller listed. Confirm your selection and proceed.
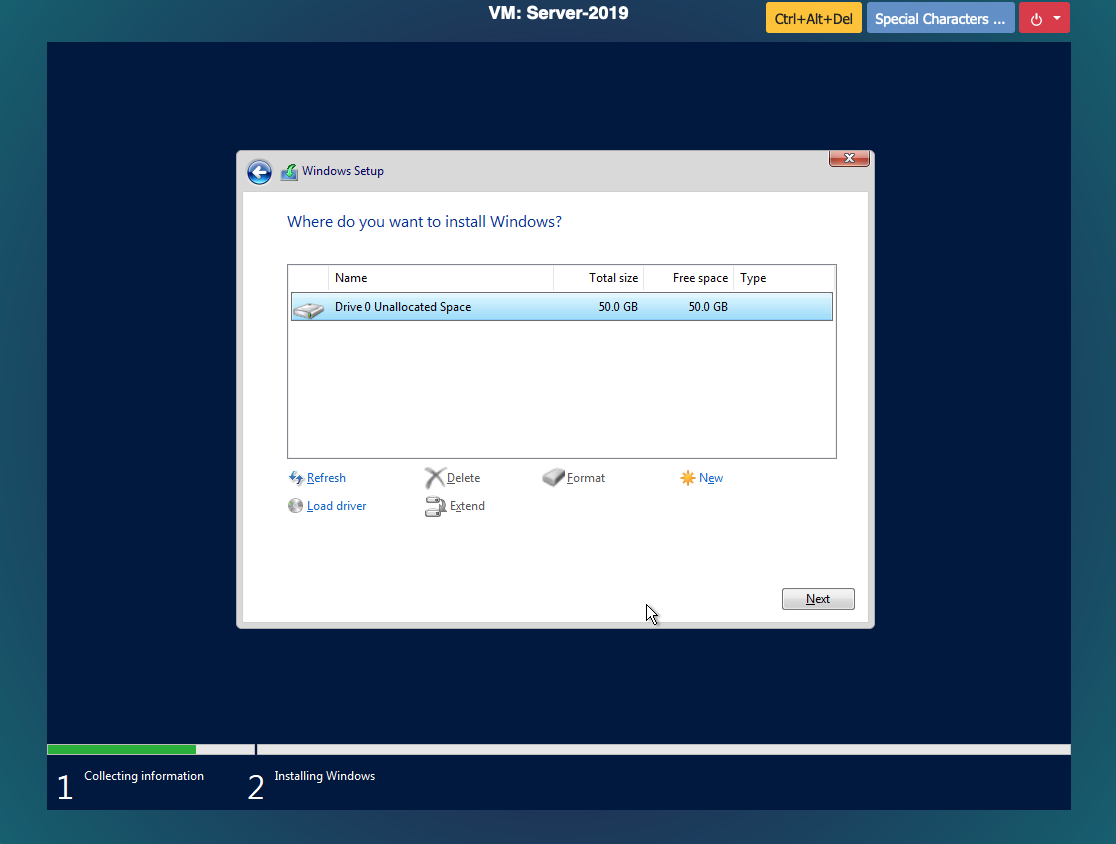
Step 5: Verify Disk Detection
The disk should now be visible in the installation wizard, allowing you to proceed with the installation.
Step 6: Load Network Driver (If Needed)
For some Windows installations, such as Windows 11, network functionality is required during the installation. If this is the case, repeat the previous steps, but this time select the Network Driver.

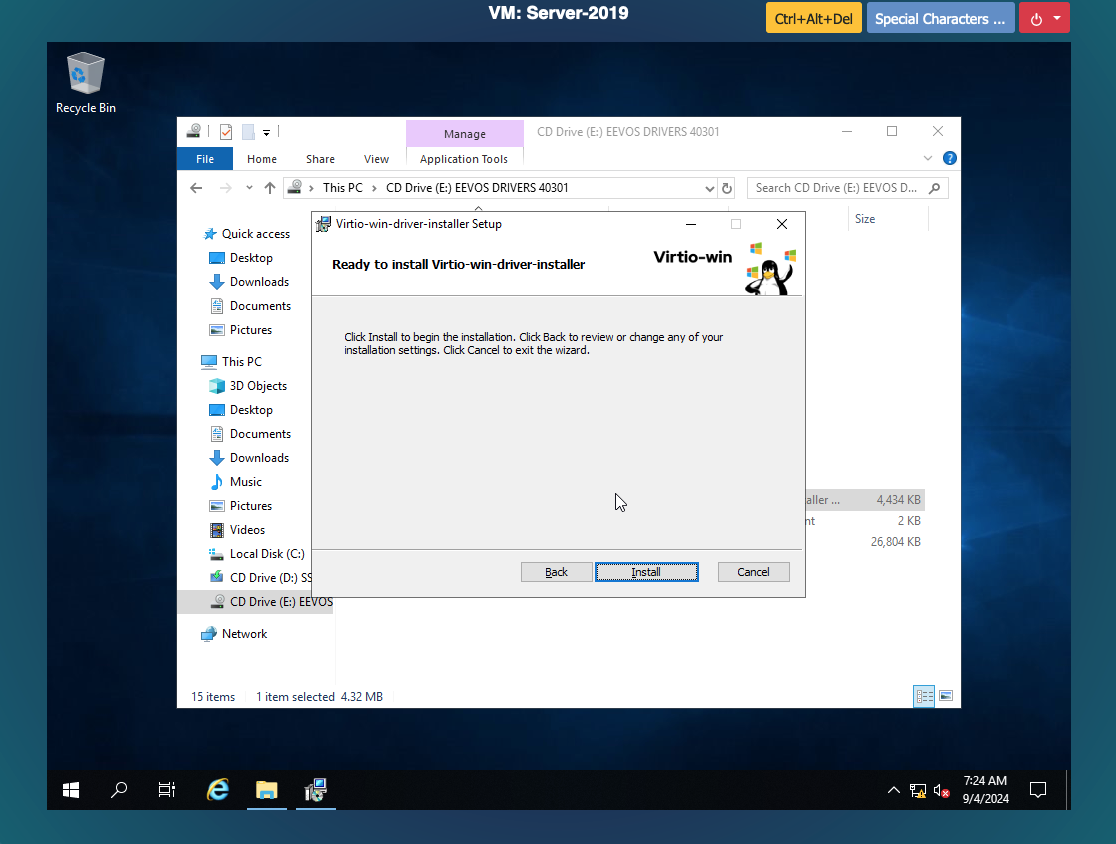
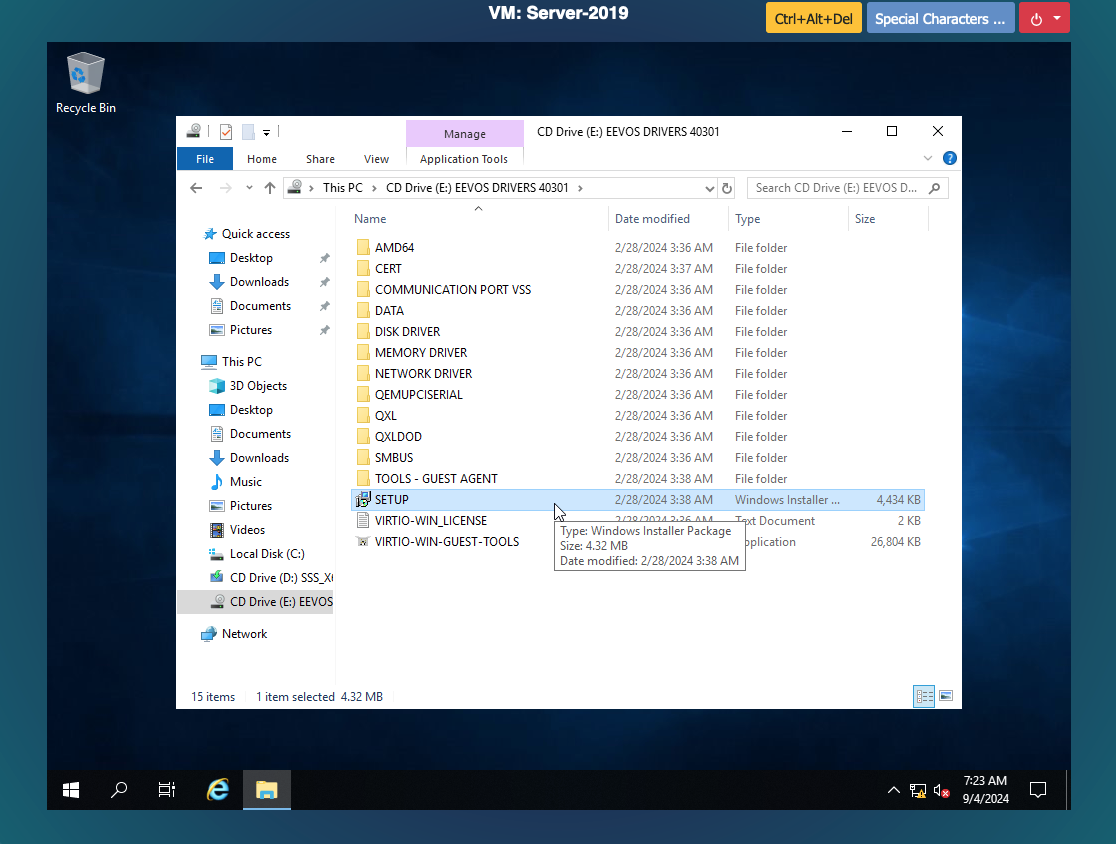
Step 7: Complete Installation and Install Remaining Drivers
After Windows has been installed, open the setup file on the installation disk to install the remaining drivers.
Step 8: Install Guest Tools
Finally, install the guest tools that are essential for features like VSS (Volume Shadow Copy Service) support, which is used by snapshots and backups.